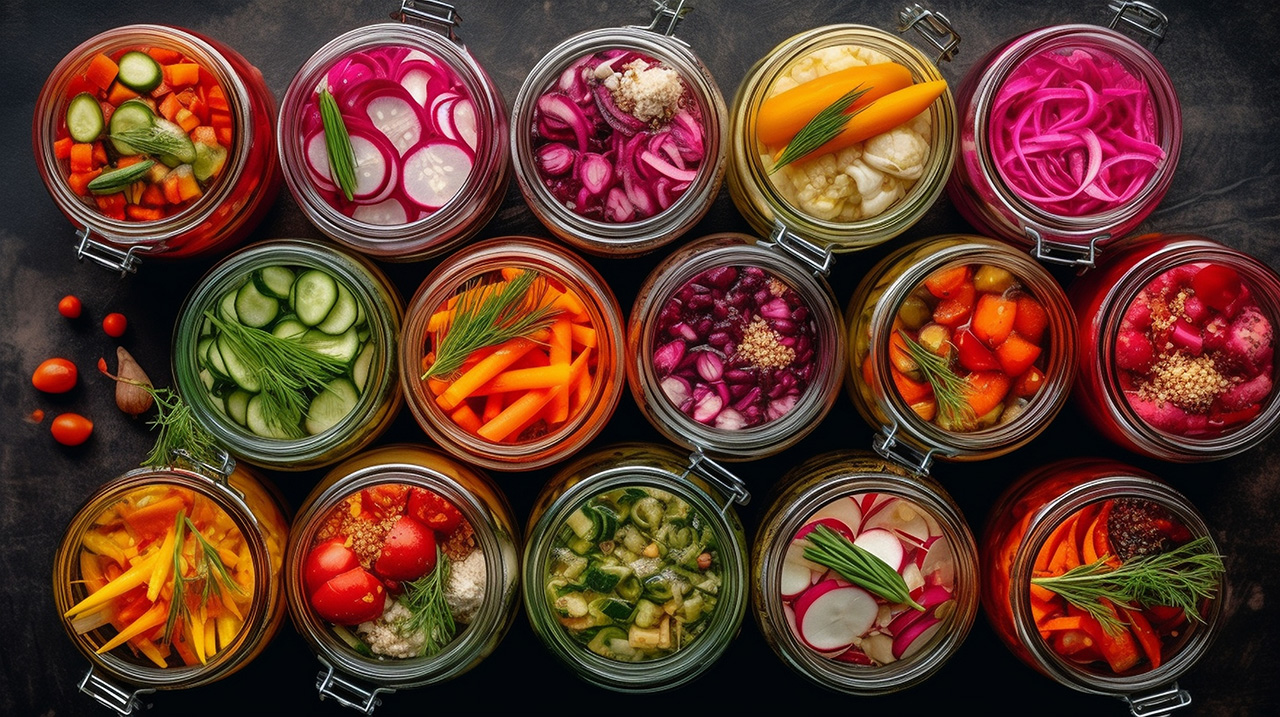
This gardening season I had a hard time getting my cucumber plants to grow. They got a much later start than normal, but I was finally able to get a few plants going. Just the other day, I noticed that the baby cukes were on, and it got me really excited to start gathering my supplies for pickling season! Pickling is the process of preserving food by immersing it in a brine or vinegar solution. The high acidity of the brine inhibits the growth of bacteria and other microorganisms, effectively preventing spoilage. This technique has been used for centuries as a means of preserving surplus harvest for the leaner months, ensuring that flavors can be enjoyed year-round. The list of food you can pickle is endless, but some of the most common pickled items include cucumbers, carrots, cabbage, beets, jalapenos, and onions.
In this blog, I will go over some benefits of pickling and share with you a couple of my favorite pickling recipes!
Benefits of Pickling
One of the beauties of pickling is its versatility. Almost any fruit or vegetable can be pickled, allowing for endless experimentation and creativity in the kitchen. I love to pickle because it offers me an opportunity to preserve the seasonal produce I grow during the warm months and allows my family and I to enjoy them throughout the year.
Pickling also has the ability to enhance nutritional value. The fermentation process involved in pickling creates probiotics, which are beneficial bacteria that promote gut health. Additionally, pickled foods often retain many of their original nutrients, making them a great way to incorporate vitamins and minerals into one's diet. This is particularly true for lacto-fermented produce, such as sauerkraut, which undergoes a natural fermentation process that unlocks the nutritional potential of the ingredients.
Spicy Garlic & Dill Pickled Beans
Every year I have an abundance of green beans, so I am constantly looking for new recipes to try. A few years ago, I came across this recipe from The House & Homestead, and I've made it every year since. These beans are so yummy and make for a quick snack but can also be used in a Bloody Mary or salad.
Ingredients:
- 4 1/2 lbs green beans, washed, trimmed and cut into jar-length pieces
- 3 Tbsp. pickling salt
- 3 cups water
- 3 cups vinegar
- 6 cloves of garlic
- 1 1/2 tsp. dried chili flakes OR 6 fresh or dried chili peppers
- 6 fresh heads of dill seed
Instructions:
- Prepare your canner and jars.
- In a saucepan, bring salt, water and vinegar to a boil over medium high heat. Heat, stirring until salt has completely dissolved.
- Remove jars from the canner and place one clove of garlic, 1/4 teaspoon of dried chili flakes OR 6 fresh or dried chili peppers and one head of dill in each hot jar.
- Pack each jar full of beans until you can't pack any more in. Then, cover with hot vinegar brine, leaving a 1/2 inch of headspace at the top.
- Jostle jars gently to allow any trapped air bubbles to escape. Wipe rims, place lids on top and screw bands down to fingertip tight.
- Process jars in a boiling hot water bath for 10 minutes. Then remove canner lid and wait another five minutes before removing jars. Allow to cool completely before storing in a cool dark place.
-
Allow pickled beans to sit for up to six weeks for best flavor results.
Garlic Dill Pickles
As I said before, I love making pickles! I don't care for sweet pickles, so I make variations of dill, garlic, and spicy pickles. I found this recipe while scrolling through Pinterest one day, from Weekend At The Cottage, and it is one of my favorites!
Ingredients:
- 1/2 bushel #2 Kirby cucumbers (about 24 lbs) washed and sorted by size
- 3 garlic bulbs, peeled and sliced
- 1 cup whole black peppercorns
- 3 bunches dill weed, heads and stalks trimmed
- 7 bird's eye chili peppers (optional)
For the pickling brine:
- 12 cups water
- 4 cups pickling vinegar
- 3/4 cup pickling salt
- 2 tablespoons granulated sugar
Instructions:
- Sterilize jars and equipment:
- Place jar lids and rings into a medium-sized bowl and cover with boiling water. Let stand for 10 minutes. Sterilize 16, 1-quart canning jars either in a dishwasher run full cycle without soap or by washing them, then letting them simmer in boiling water for 10 minutes. Sterilize canning funnel and ladle in the same manner.
- Make the brine:
- Place all of the ingredients for the brine into a medium-sized stainless steel pot and stir until the sugar and salt dissolve. Bring the brine to a boil.
- Fill the jars:
- Place one head from the dill weed and a few bits of the stalk into each sterilized jar. Add about a tablespoon of garlic and 8 to 10 peppercorns. Add the peppers if using.
- Pack cucumbers tightly, positioned upright, into the jars. Stuff the jars to 1/2 inch from top.
- Canning:
- Place sterilized funnel on top of the first jar. Carefully ladle the hot brine into the jar leaving 1/4 inch headspace. Wipe with a wet paper towel to remove any ingredients from the rim of the jar. Tap jars gently on work surface to remove air bubbles.
- Place sterilized lid on top using magnet wand or tongs. Place ring on top and turn just until finger tight. Repeat process until all jars are filled.
- Transfer filled jars to boiling water and process for 10 minutes. Carefully remove jars from pot while the color of the cucumbers is still slightly mottled. Place onto work surface and leave undisturbed for 24 hours. Check that the center area of each lid has compressed or, popped. Wipe jars clean and store in cool, dark and dry place.
I'd love to hear some of your favorite pickling recipes! If you get a chance to try either of these, let me know in the comments. Happy pickling!